Structured template content type
version 0.1 | Read time 3m 08s
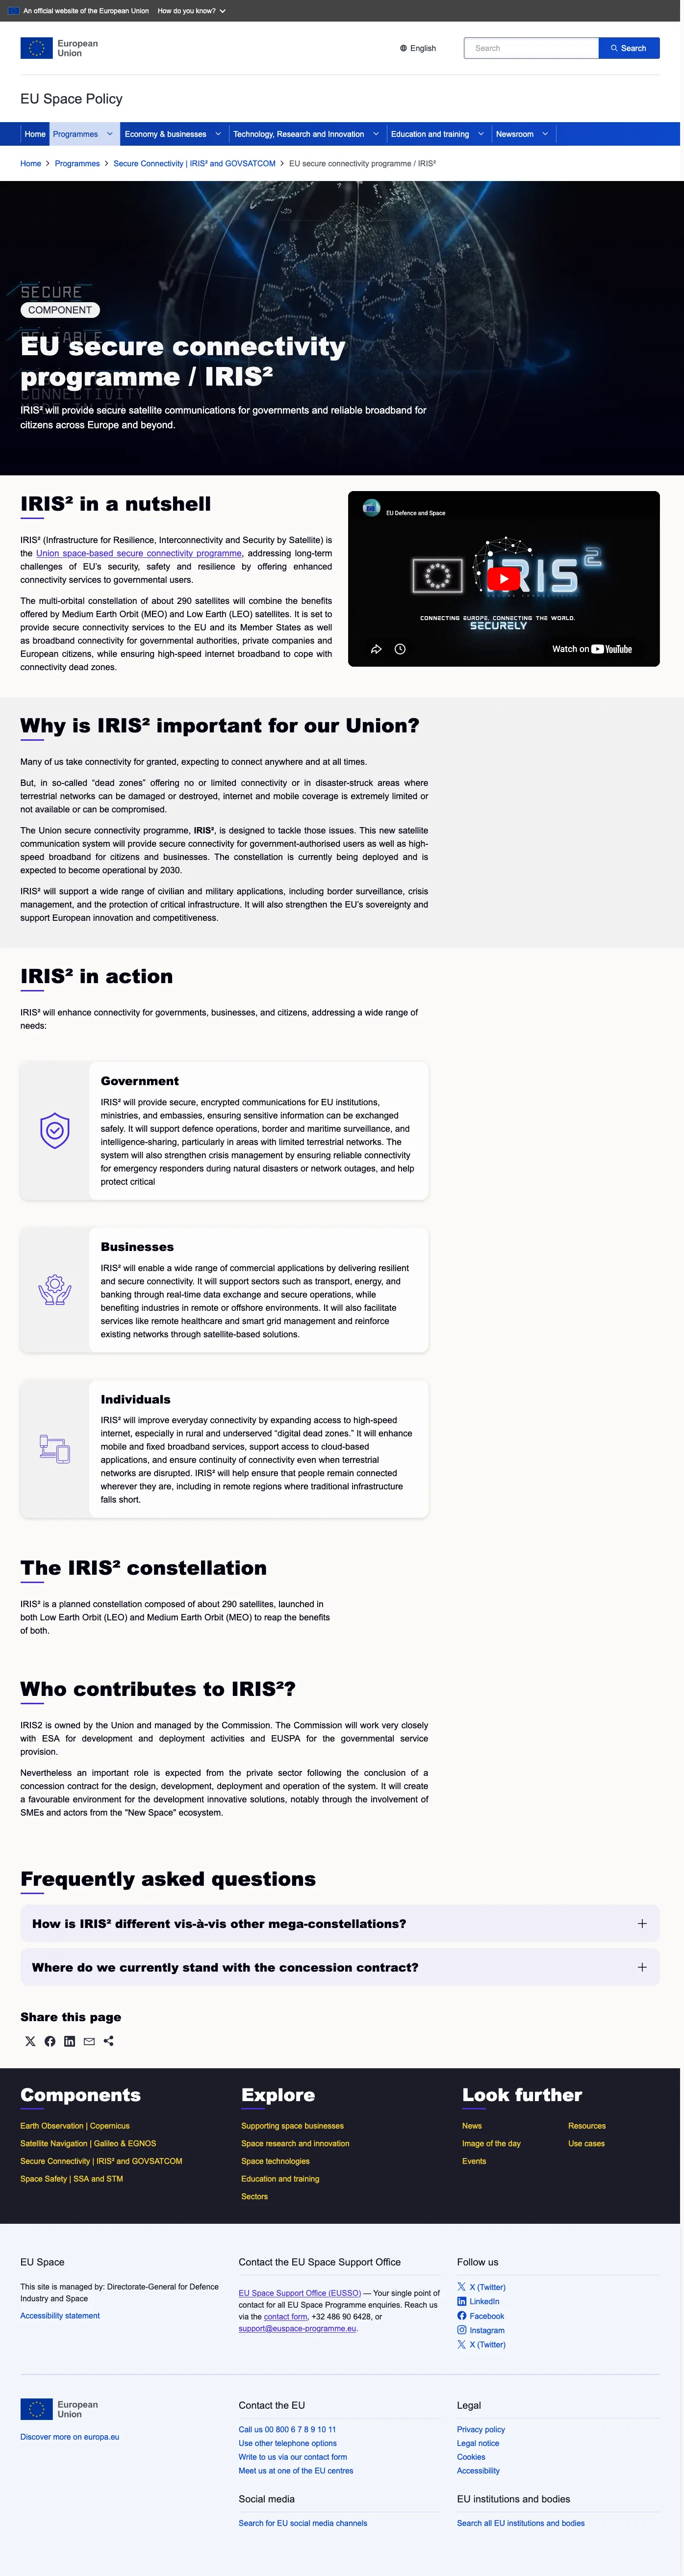
Structured template is the most flexible content type on the portal — use it for landing pages, service home pages, programme overviews, “About” pages and anything generic that doesn’t fit one of the dated content types (News, Event, …).
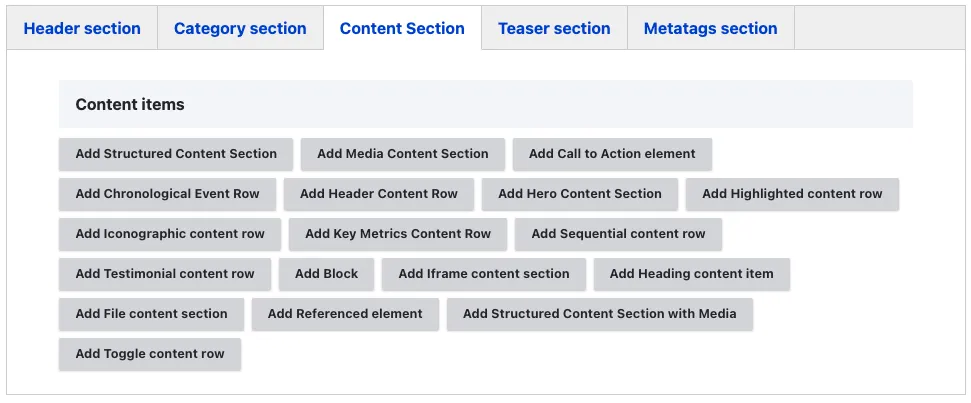
Structured templates are built from reusable content blocks, called paragraphs in Drupal. The Content header field accepts a Header Content Row or a Structured Content with Media block. The Content items field contains the ordered blocks that form the page body. See Working with content blocks.
Step-by-step: create a structured template
1. Open the add form
Dashboard → + Add content → Structured template
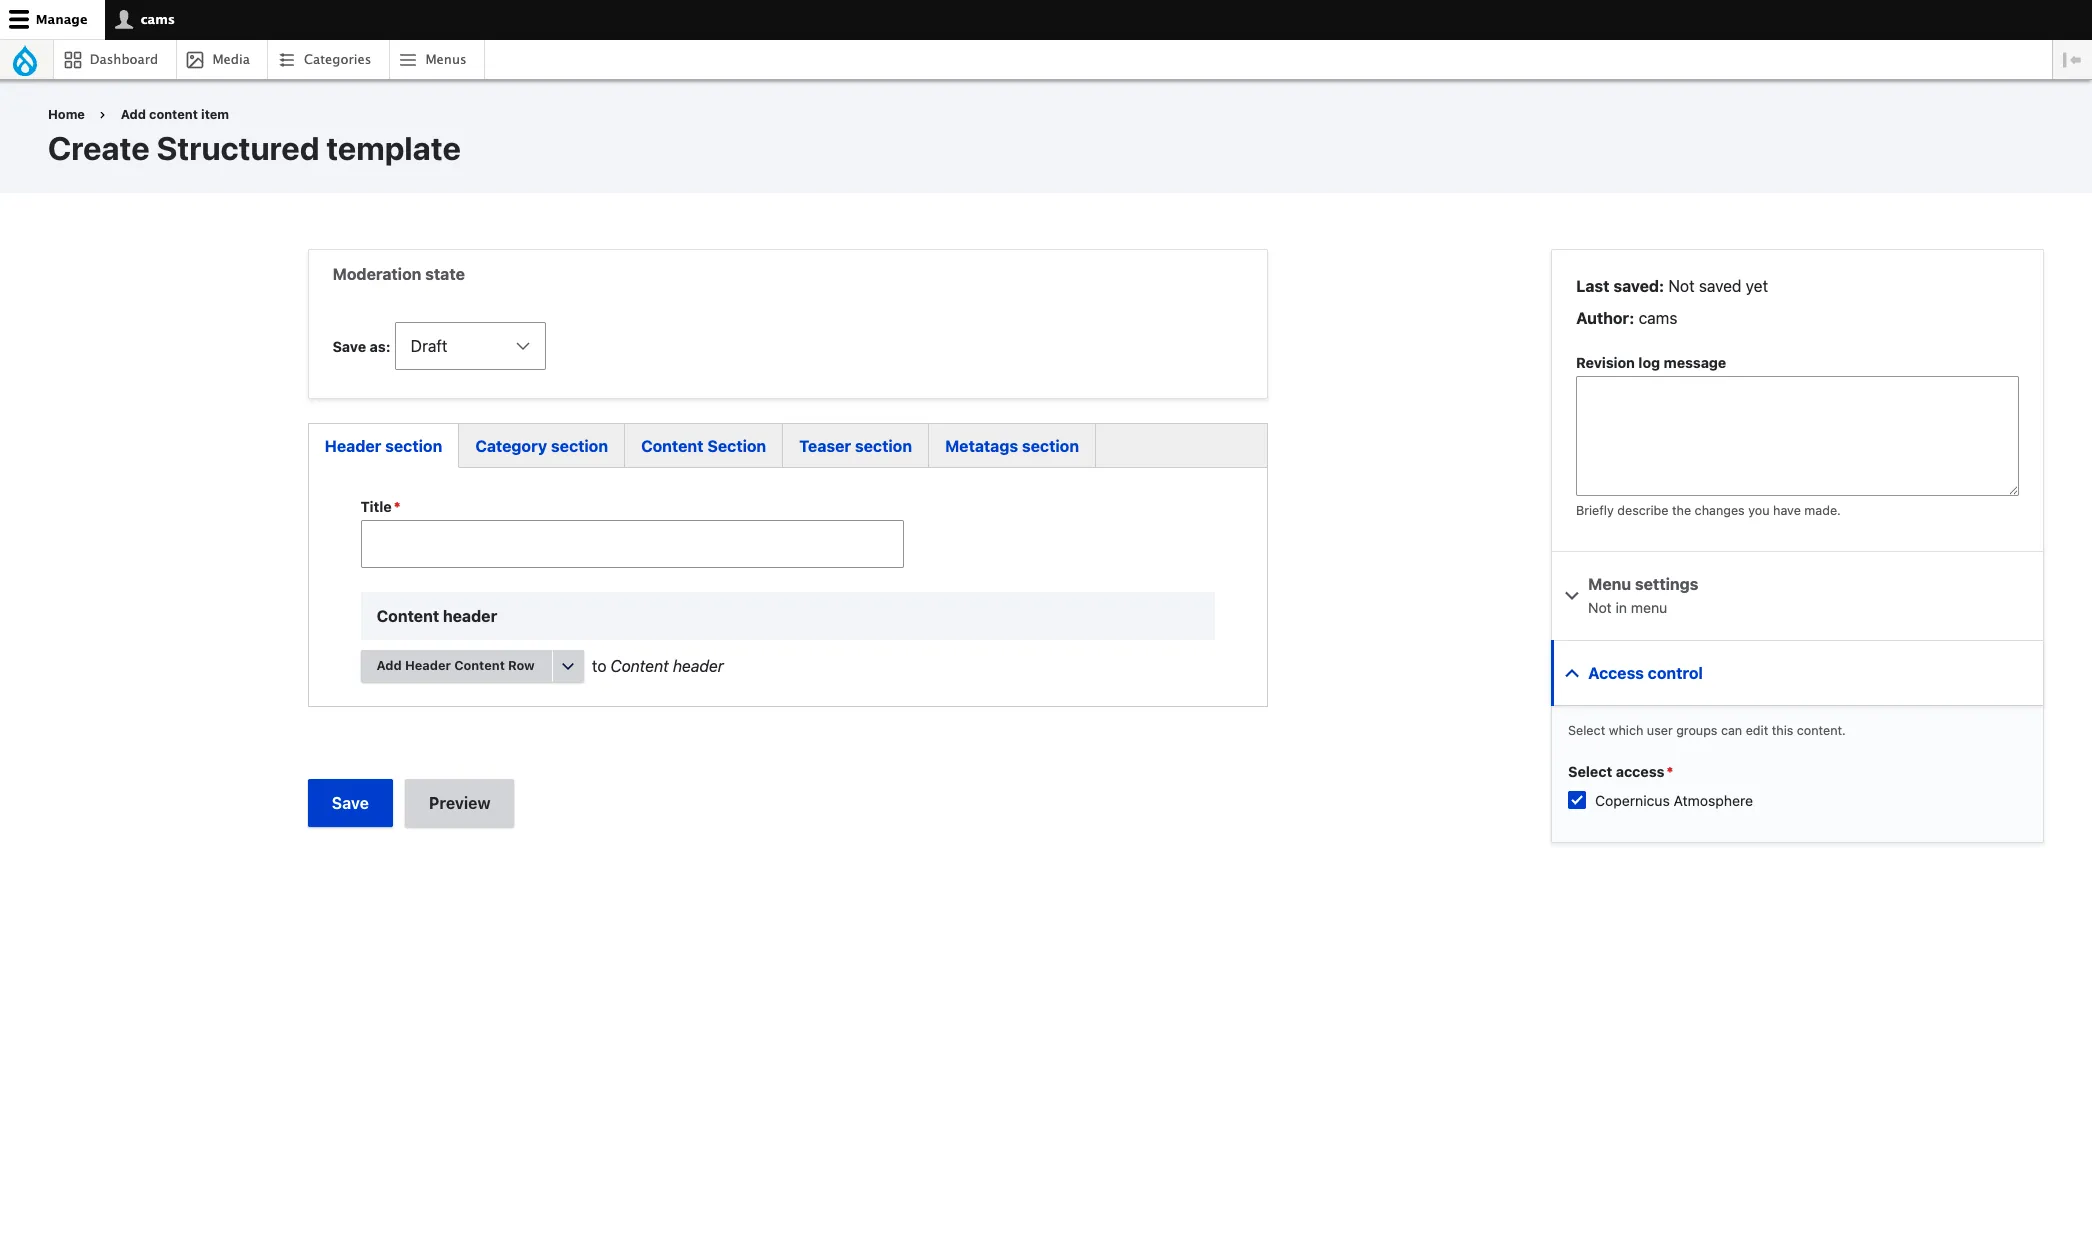
2. Header section — title, header paragraph
Default open tab. Fill:
- Title (required) — the page’s internal name and the basis for URL generation. It is rendered as the page H1 when no Header Content Row is present. When a Header Content Row is used, that row’s Title becomes the visible H1 instead.
- Content header (optional but expected) — select Add Header Content Row for a standard banner header, or open List additional actions and select Add Structured Content with Media for a text-and-media opening. See Header Content Row for the banner walkthrough.
3. Category section — taxonomies
*The category section classifies the page and controls which taxonomy fields are required.
- Page type (required) — select one of five values: Component, Sector, Service, Overview, or Utility. This choice determines the page template and which taxonomy fields below become mandatory.
- Service — the EU Space service this page covers (Copernicus, Galileo, EGNOS, GOVSATCOM, etc.). Required when Page type is set to Service.
- Sector — the thematic sector. Required when Page type is set to Sector.
- Component — the programme component. Required when Page type is set to Component or Service.
Select the Page type first, then fill in the matching taxonomies. Changing the Page type after filling in other fields can trigger different validation rules and block the save.
4. Content Section — the body
- Content items — select the appropriate Add… button for each section you need. The blocks appear on the page in the same order as they appear in the form. See Working with content blocks.
5. Teaser section — listings
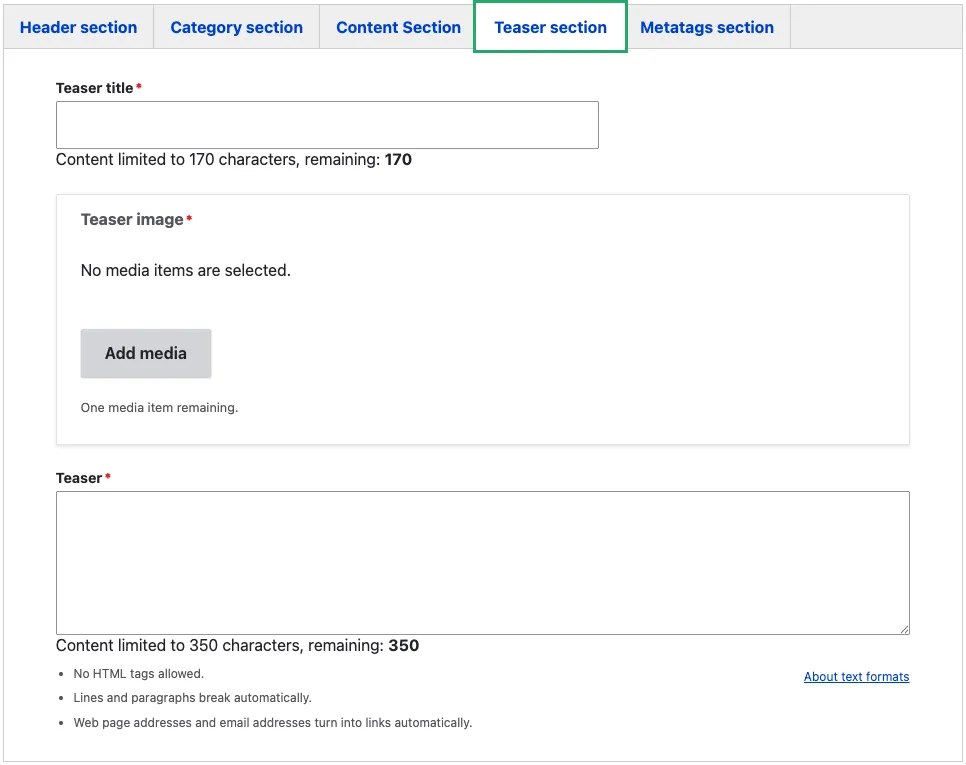
These fields drive how the page appears in listings and search results:
- Teaser title (required) — short title used on cards. Often the same as the page title; override only when the page title is too long for a card.
- Teaser image (required) — the card thumbnail. 16:9 minimum 1200×675.
- Teaser (required, plain text) — the short description shown under the title in cards.
6. Metatags section
Override the SEO defaults if needed. See Metadata options.
7. Sidebar
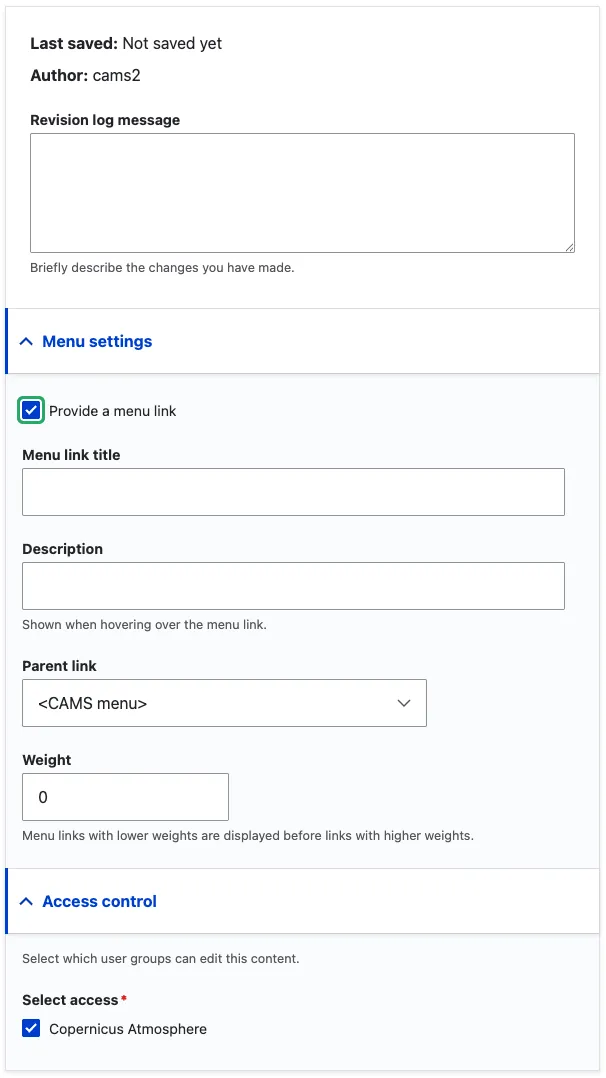
The sidebar on the right-hand side of the edit form contains the following fields:
- Revision log message — briefly describe what you changed in this edit. This is visible in the revision history and helps other editors understand what was updated and why.
- Menu settings — controls the page’s position in the service sidebar navigation and its breadcrumb trail.
- Provide a menu link — check to add the page to the sidebar menu. Leave unchecked for standalone pages.
- Menu link title — the label shown in the sidebar. Keep it short — it does not have to match the full page title.
- Description — tooltip text shown when hovering over the menu link. Optional.
- Parent link — where the page sits in the menu hierarchy. Select the service menu (e.g. CAMS menu) for top level, or an existing item to nest underneath. This also determines the breadcrumb path.
- Weight — sort order among siblings. Lower numbers appear higher. Drag-and-drop in the menu admin screen is usually easier.
- Access control (required) — select the organisation that owns this page. Only editors belonging to the selected organisation can edit or publish it.
8. Save
Click Save. The page is saved as Draft. Use the Moderation state dropdown at the top of the form to move it through Needs Review → Published when ready (see Content workflow).
Common mistakes
- Empty Content items. A Structured Template with no body content blocks displays only its header. Add the page body before publishing unless a header-only page is intentional.
- No teaser image. The required field will block save, but editors sometimes upload a placeholder. Set the real teaser image before publishing — it’s what listings show.
- Picking the wrong Page type. Page type controls the template wrapper. Landing-style page types unlock specific layouts; generic pages don’t. If the rendering looks wrong, check this first.
Recommended composition
A typical structured template body uses:
- Header Content Row in the Content header, or a Structured Content Section with Media as the first body block for a more visual opening.
- Structured Content Section introducing the topic in one or two short paragraphs of text.
- Alternating Structured Content with Media blocks to create a clear text-and-image rhythm.
- Key Metrics Row to surface headline numbers.
- Sequential or Chronological content row if the topic has a process or timeline.
- Highlighted content row as the closing takeaway with a Primary CTA.
Structure template example