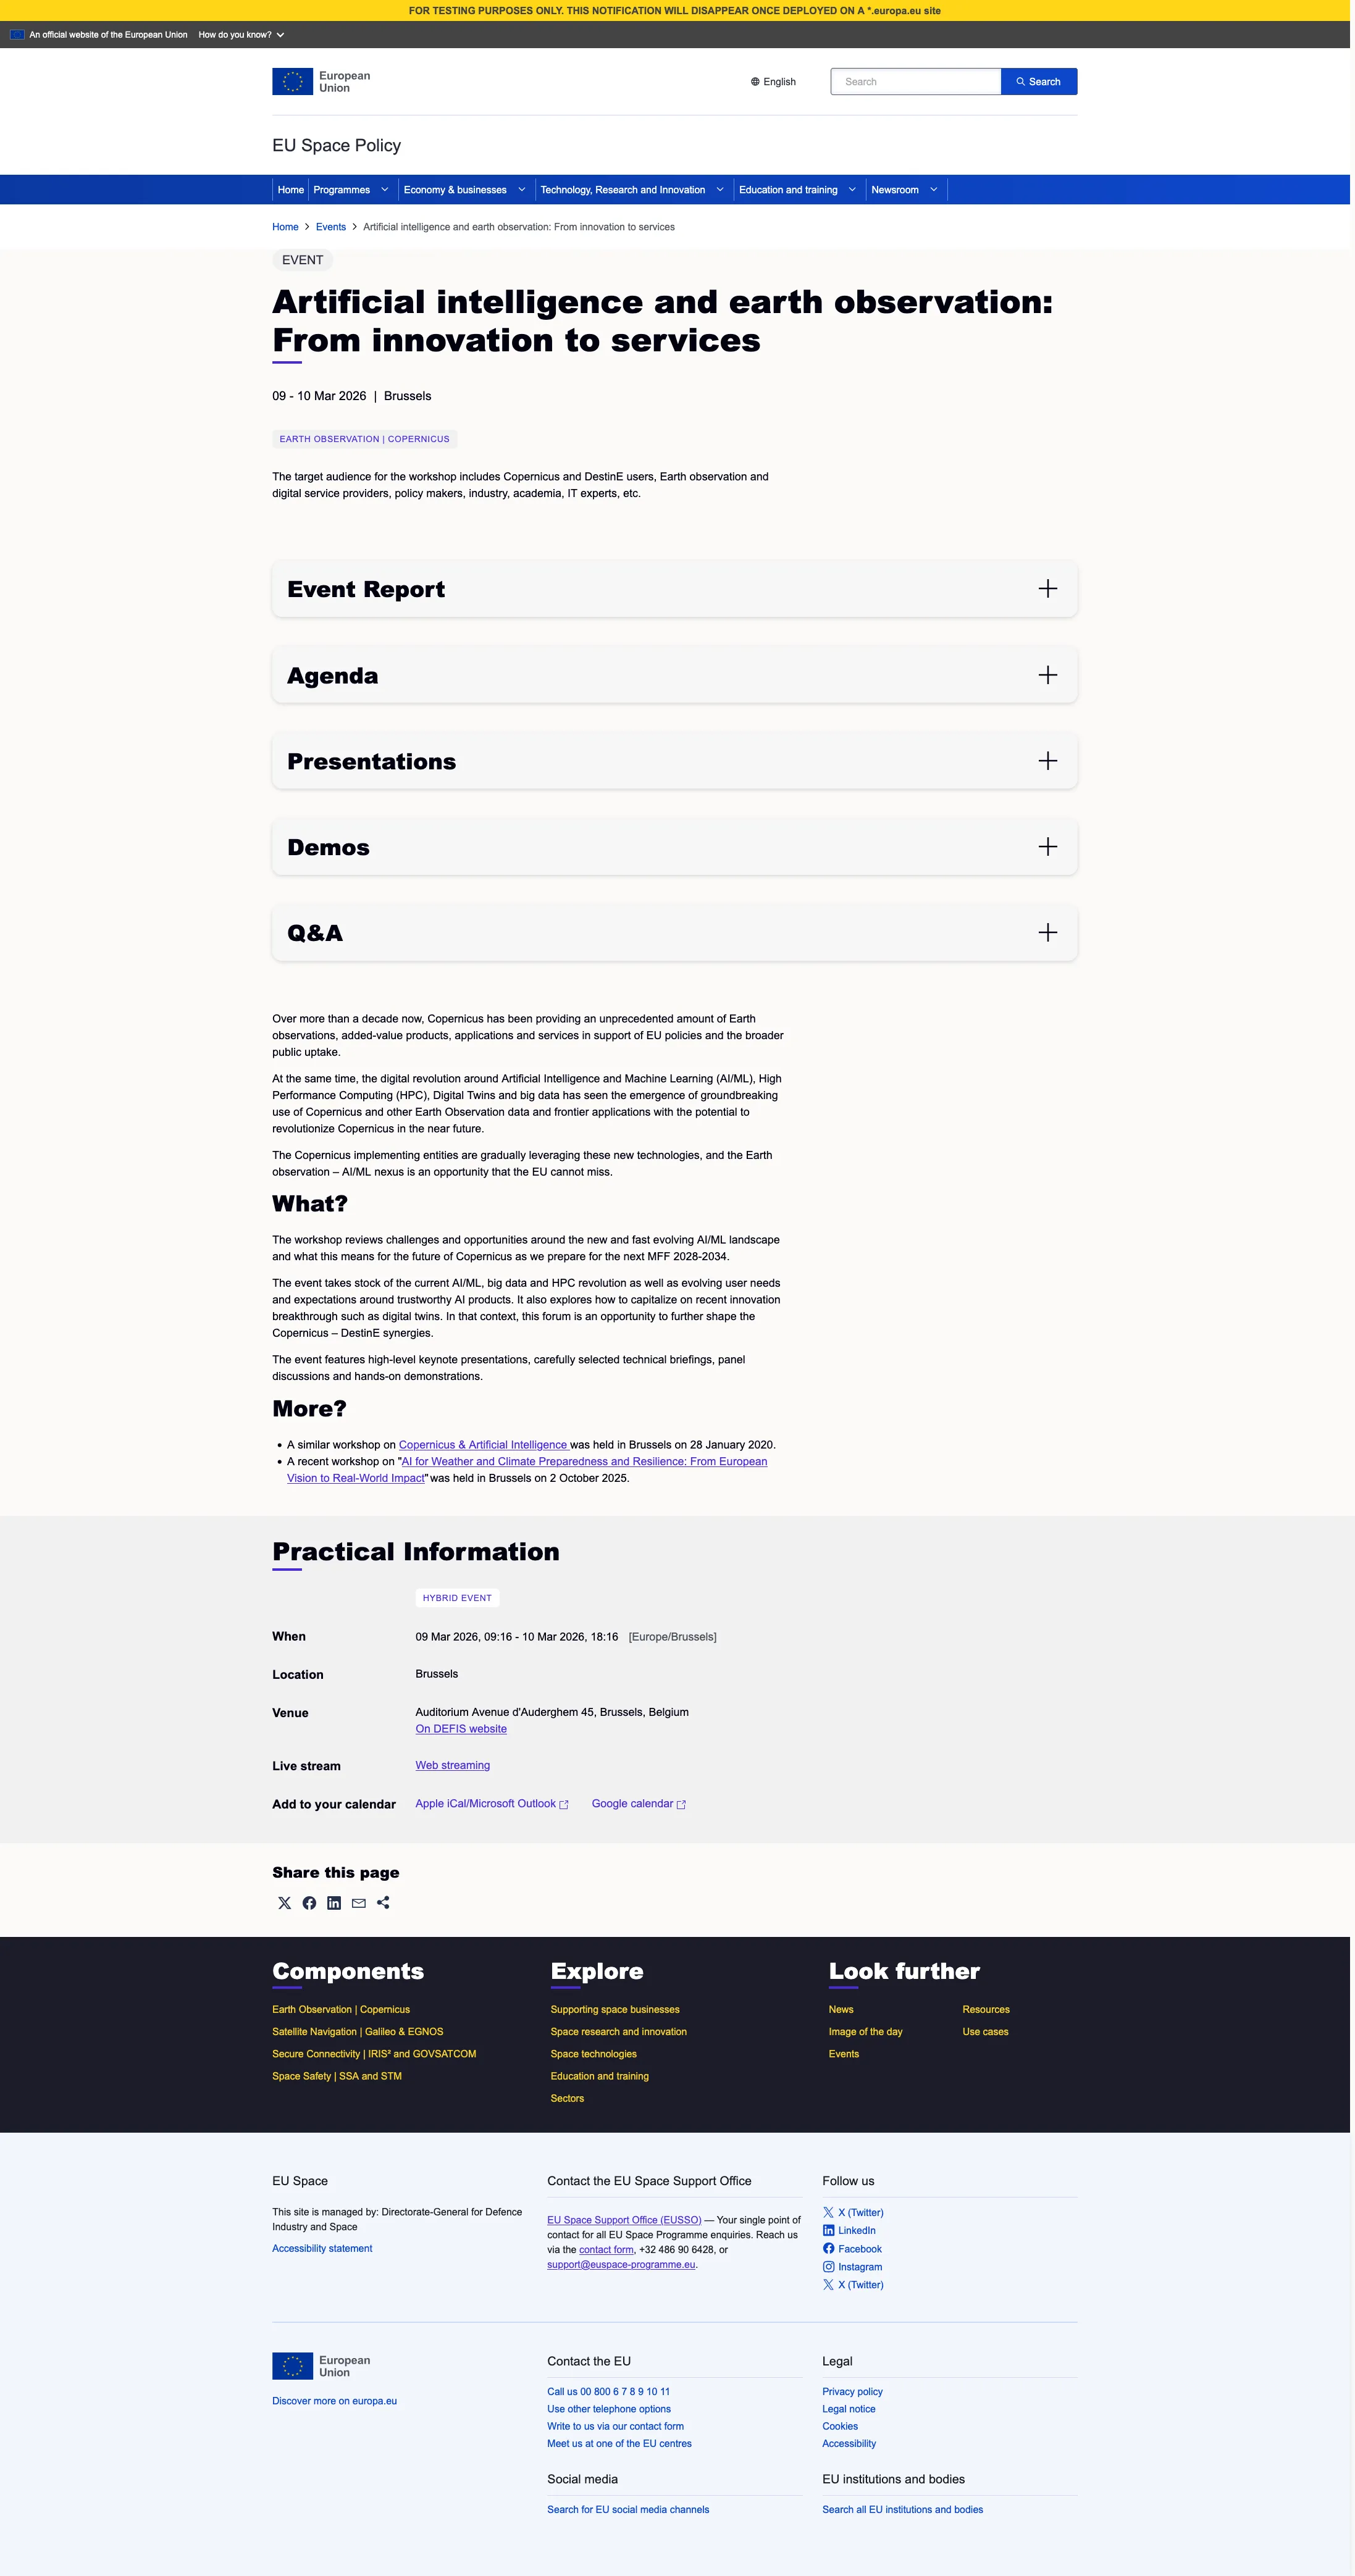
Event content type
version 0.1 | Read time 3m 20s
Event records past and upcoming events — conferences, webinars, info days, workshops, side events. Events carry structured practical information (date range, time zone, format, venue, organisers, registration link) on top of the usual editorial body.
Step-by-step: create an event
1. Open the add form
Dashboard → + Add content → Event.
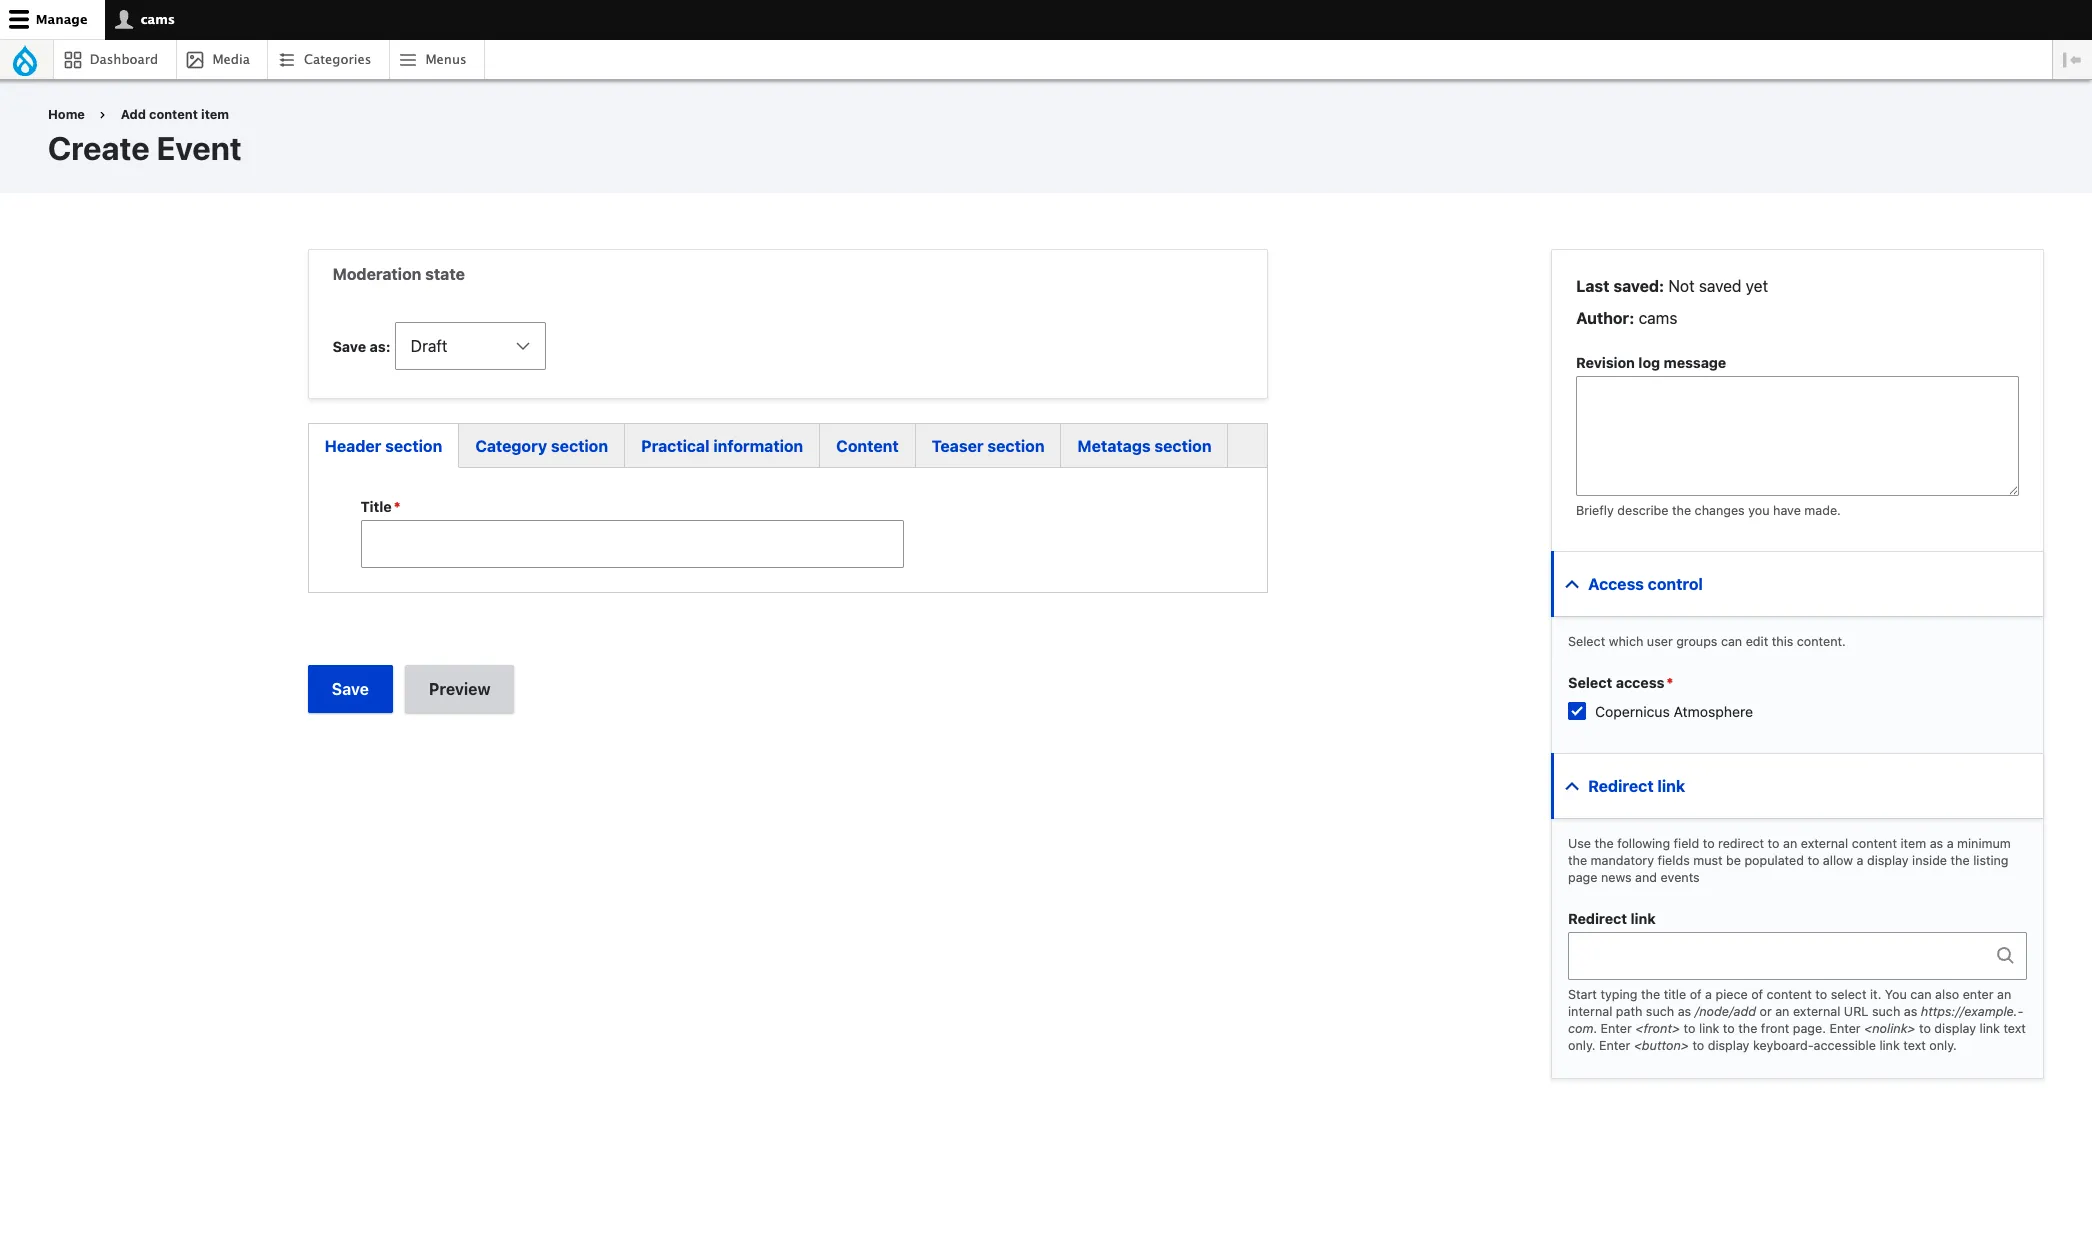
2. Header section
- Title (required) — the event name.
3. Category section — taxonomies
- Component (required) — programme component.
- Service (optional) — pick the EU Space service this concerns. Drives the service-accent colour and the service-scoped listings.
- Sector (optional).
- Event type (required) — Awards Ceremony, B2B, B2C, Conference, Corporate Event, Exhibition, General, Hackathon, Masterclass, Meetup, Networking Event …
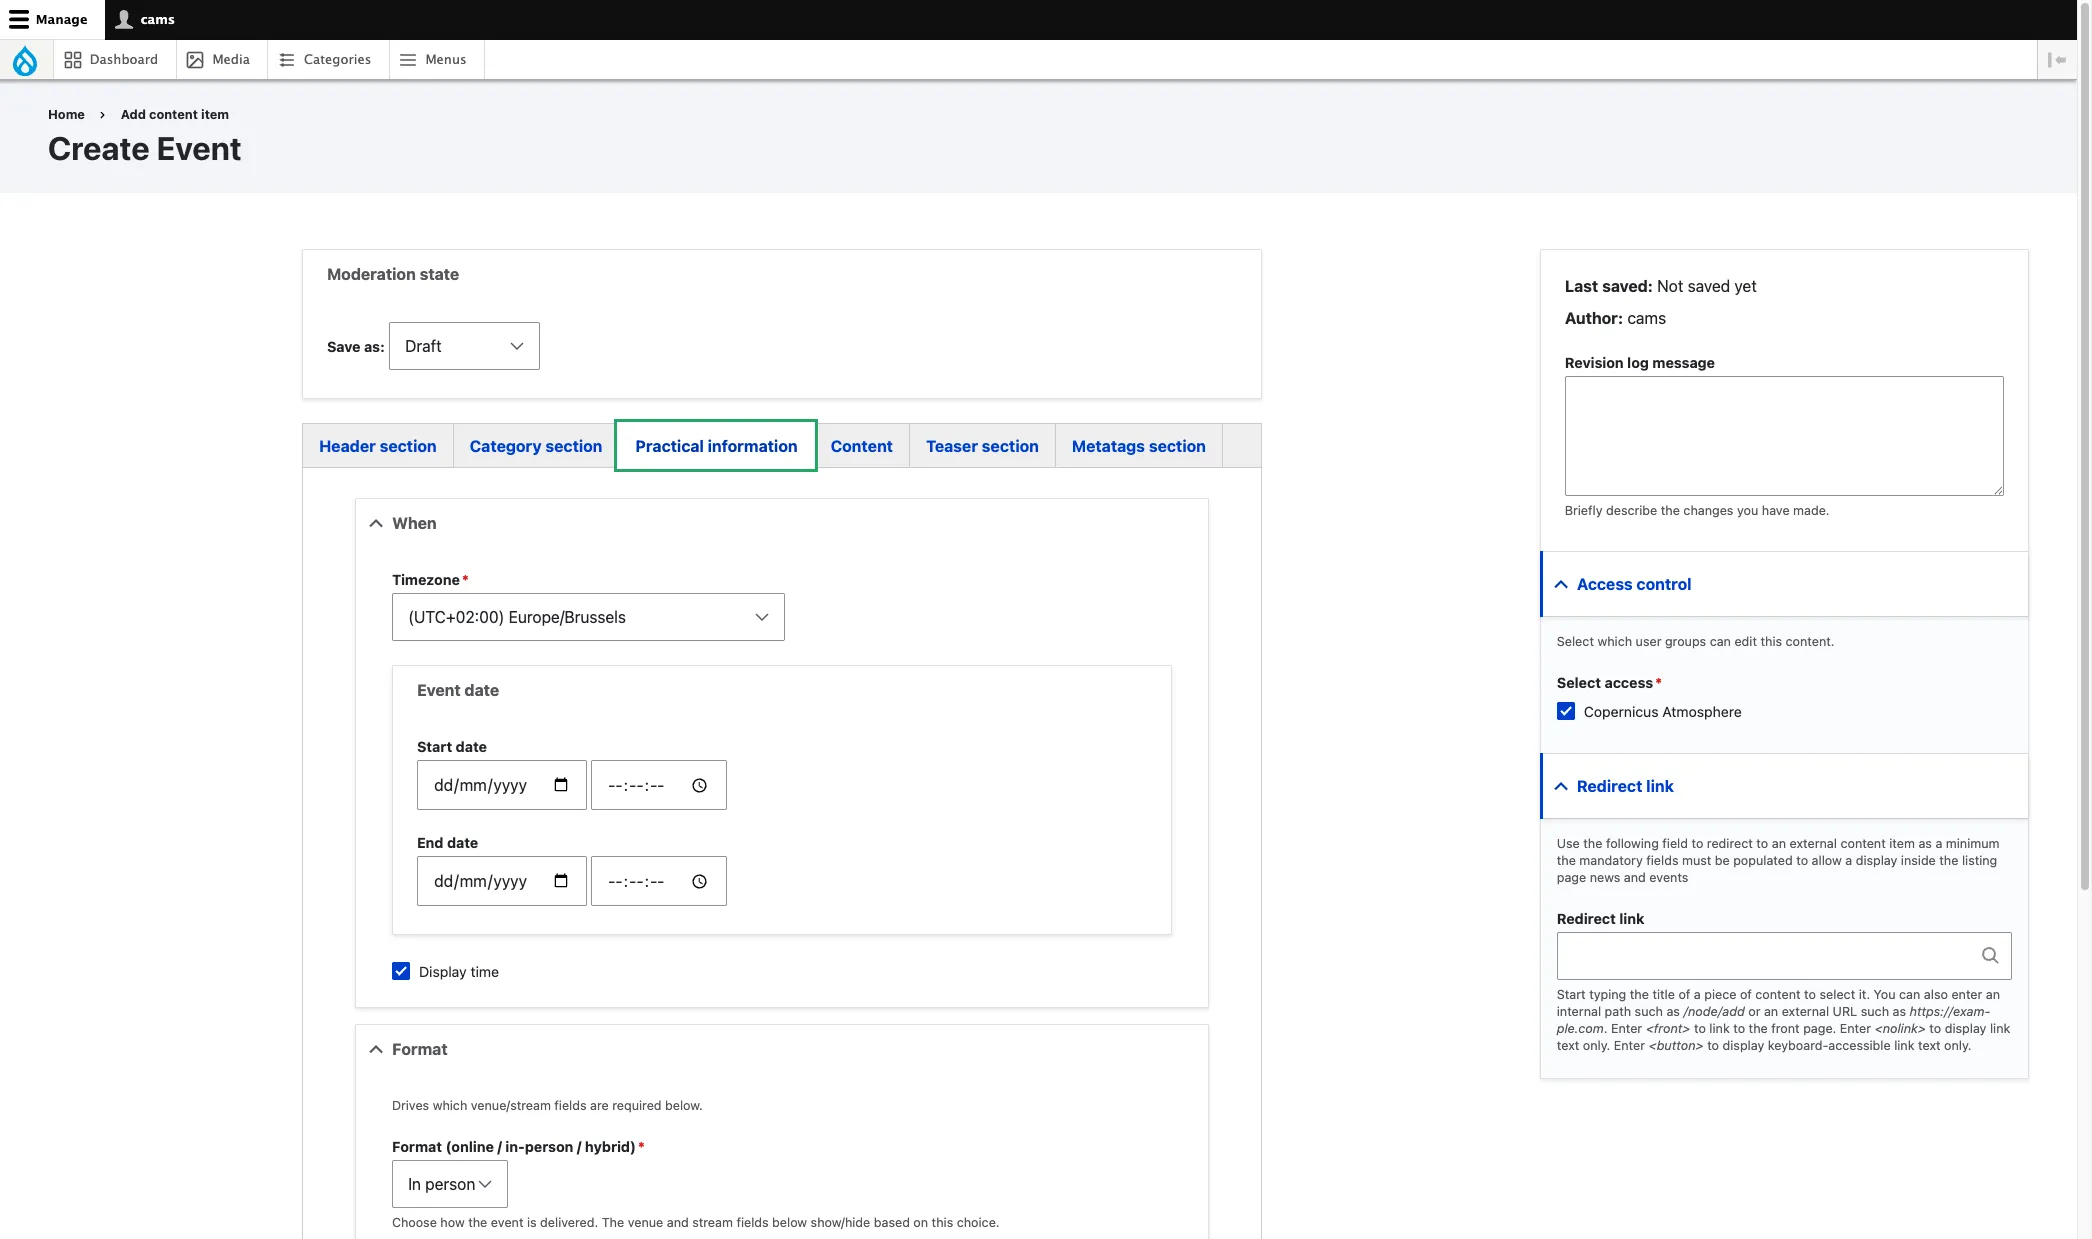
4. Practical information — the structured event fields
This is the tab visitors care about most. Fill carefully:
- Event date (daterange) — start and end. Use the date+time picker. Required for most editorial purposes even though the field is technically optional in config.
- Timezone (required, tzfield) — pick the venue / organiser timezone. Drives the time conversion shown to international visitors.
- Display time (optional, boolean) — tick to show the time; untick when the event is multi-day with no fixed schedule and you don’t want misleading hours displayed.
- Format (required) — online / in-person / hybrid.
- Location (string) — city / country.
- Venue (string) — full venue address.
- Organisers (string) — comma-separated list of organising entities.
- Registration link (link) — URL of the registration form / sign-up portal.
- Live stream URL (link) — for online / hybrid events, the live feed link.
- Access information (link) (link) — practical access info page (visa, venue access).
- Contact link (page or form) (link) — visitor contact form / page.
- Contact email (email) — public contact email.
- Event programme (PDF or URL) (link) — link to the agenda PDF or programme page.
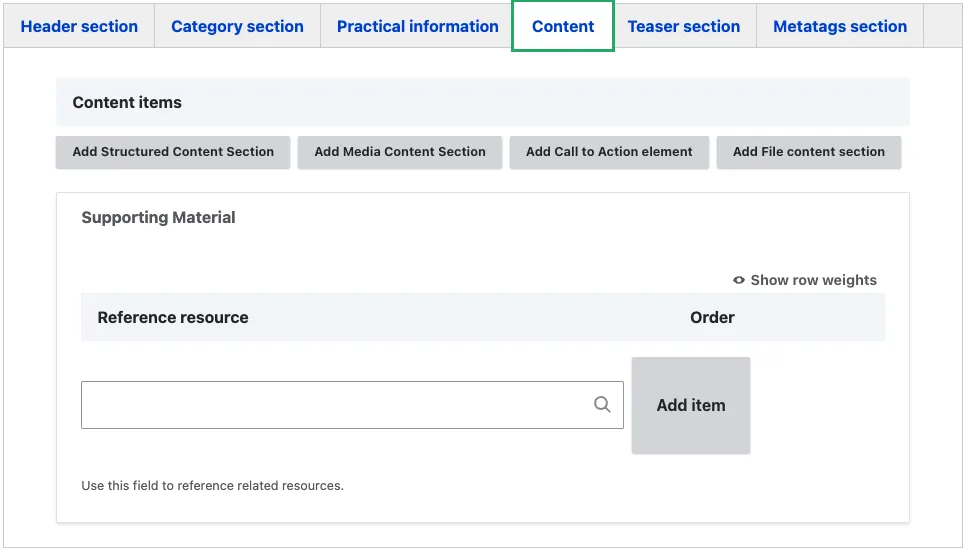
5. Content Section — the body
- Content items — the ordered collection of content blocks that forms the page body. Use:
- Structured Content Section for the event description and “About” sections.
- Media Content Section for the speaker gallery.
- Call to Action Element — button or link directing visitors to a next step
- File content section to attach programme PDFs and registration packs.
You do not need to use every content block type. Choose only those that suit the event.
Reference resource — reference existing Resource content items (factsheets, reports, videos) that relate to the event. Start typing a resource title in the search field and select from the suggestions.
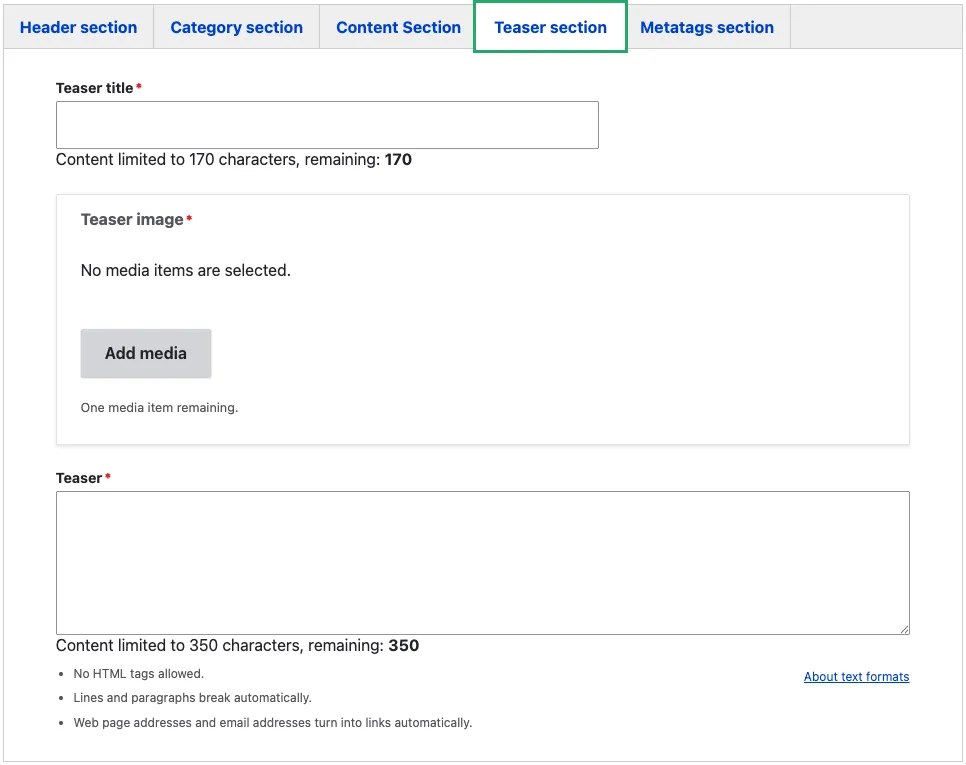
6. Teaser section
These fields drive how the page appears in listings and search results:
- Teaser title (required) — short title used on cards. Often the same as the page title; override only when the page title is too long for a card.
- Teaser image (required) — the card thumbnail. 16:9 minimum 1200×675.
- Teaser (required, plain text) — the short description shown under the title in cards.
7. Metatags section
Override the SEO defaults if needed. See Metadata options.
8. Sidebar
The sidebar on the right-hand side of the edit form contains the following fields:
-
Revision log message — briefly describe what you changed in this edit. This is visible in the revision history and helps other editors understand what was updated and why.
-
Access control (required) — select the organisation that owns this content. Only editors belonging to the selected organisation can edit or publish the page. In the example above, “Copernicus Atmosphere” is selected, meaning only CAMS editors can modify this article.
-
Redirect link — use this when the event is hosted on an external site and you want the listing card to link there instead of rendering a page on eu-space. Enter an external URL or start typing an internal page title. When set, visitors who click the card in an events listing are taken directly to the linked destination. Leave empty for standard events hosted on the platform. The mandatory teaser fields (title, text, image) must still be filled so the card displays correctly in listings.
9. Save and publish
Click Save. The page is saved as Draft. Use the Moderation state dropdown at the top of the form to move it through Needs Review → Published when ready (see Content workflow).
Common mistakes
- Wrong timezone. The displayed time is converted from this field. Picking the wrong timezone shifts the event by hours for international visitors.
- Past event left “Display time” off. Past events stay published as an archive. Leaving Display time off makes the archive vague.
- No Registration link on a registration-required event. Visitors won’t know where to sign up. Always set it or note “Registration not yet open” in the body.
- Reusing a previous edition’s timezone without checking. When you create a new edition by copying field values from a previous one, double-check the timezone — daylight saving may have changed.
Tips
- For recurring events such as annual conferences, open the previous edition in a second browser tab and copy the relevant practical information into a new Event page. Then update the date range, venue, and registration link. The site does not provide a one-click copy action; each edition must be created as a new page.
- Past events stay published — events do not get unpublished automatically. They feed the historical archive and sort below upcoming events because the listing sorts by Event date.
- For online-only events, still set a Timezone — the front-end uses it to localise the displayed time for international audiences.
Event example